For the complete documentation index, see llms.txt. This page is also available as Markdown.

Personalize Your Workspace

What happens the first time you sign in: pick how you'll use Revenium, get a home and sidebar tailored to that role, connect your AI assistants with a guided setup, and start from one-click alert temp

The first time you sign in, Revenium asks how you plan to use it and tailors the app around that answer. Picking a role reorders your sidebar, changes what your home page leads with, and pre-selects the alert templates most relevant to you. Nothing is locked in — you can change your role or reset the layout at any time.


Choose your role

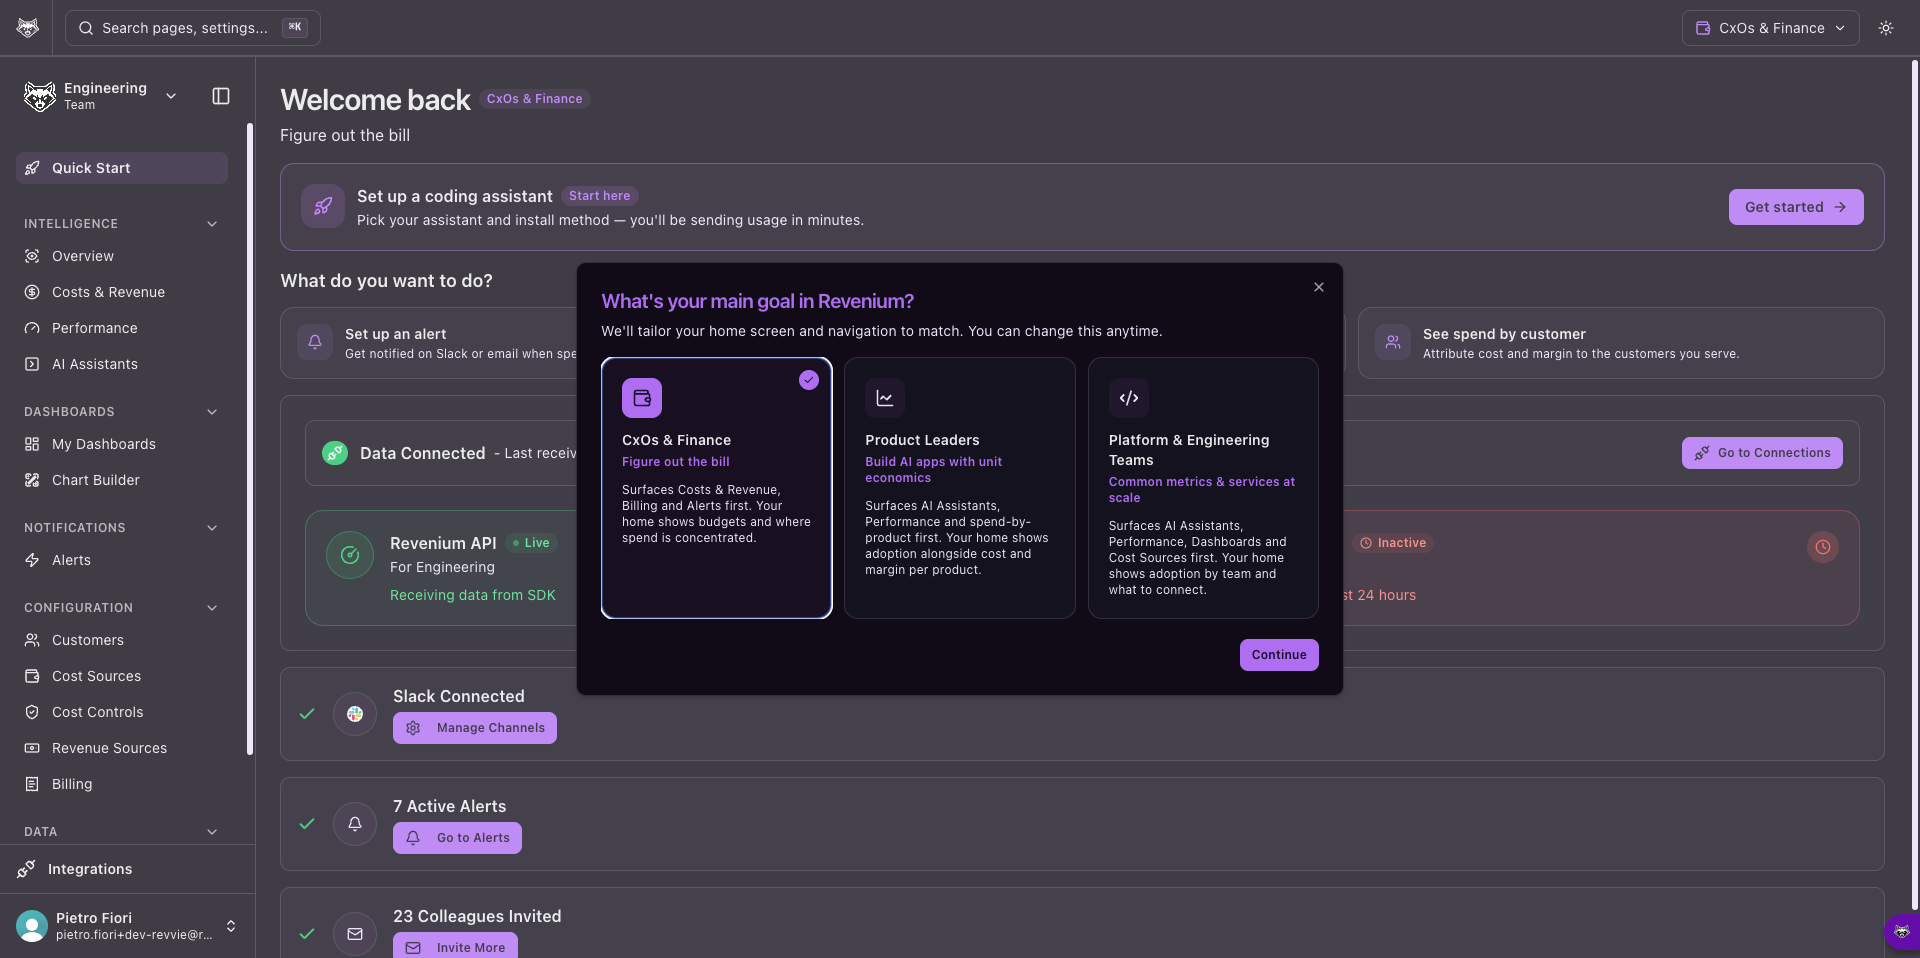
On first sign-in an onboarding dialog asks how you'll use Revenium. Pick the role that fits you best:

Onboarding dialog asking "What's your main goal in Revenium?" with three role cards
Pick your role on first sign-in — CxOs & Finance, Product Leaders, or Platform & Engineering Teams.
Role
Best for
Your workspace leads with

CxOs & Finance

Figuring out the bill

Costs & Revenue, Billing, and Alerts first; a home focused on budgets and where spend is concentrated.

Product Leaders

Building AI apps with unit economics

AI Assistants, Performance, and spend-by-product first; a home showing adoption alongside cost and margin per product.

Platform & Engineering Teams

Common metrics and services at scale

AI Assistants, Performance, Dashboards, and Cost Sources first; a home showing adoption by team and what to connect next.

Your choice only affects your own view — it does not change your permissions, your team, or what other users see. If you'd rather explore first, you can skip the dialog and pick a role later.


Your personalized home

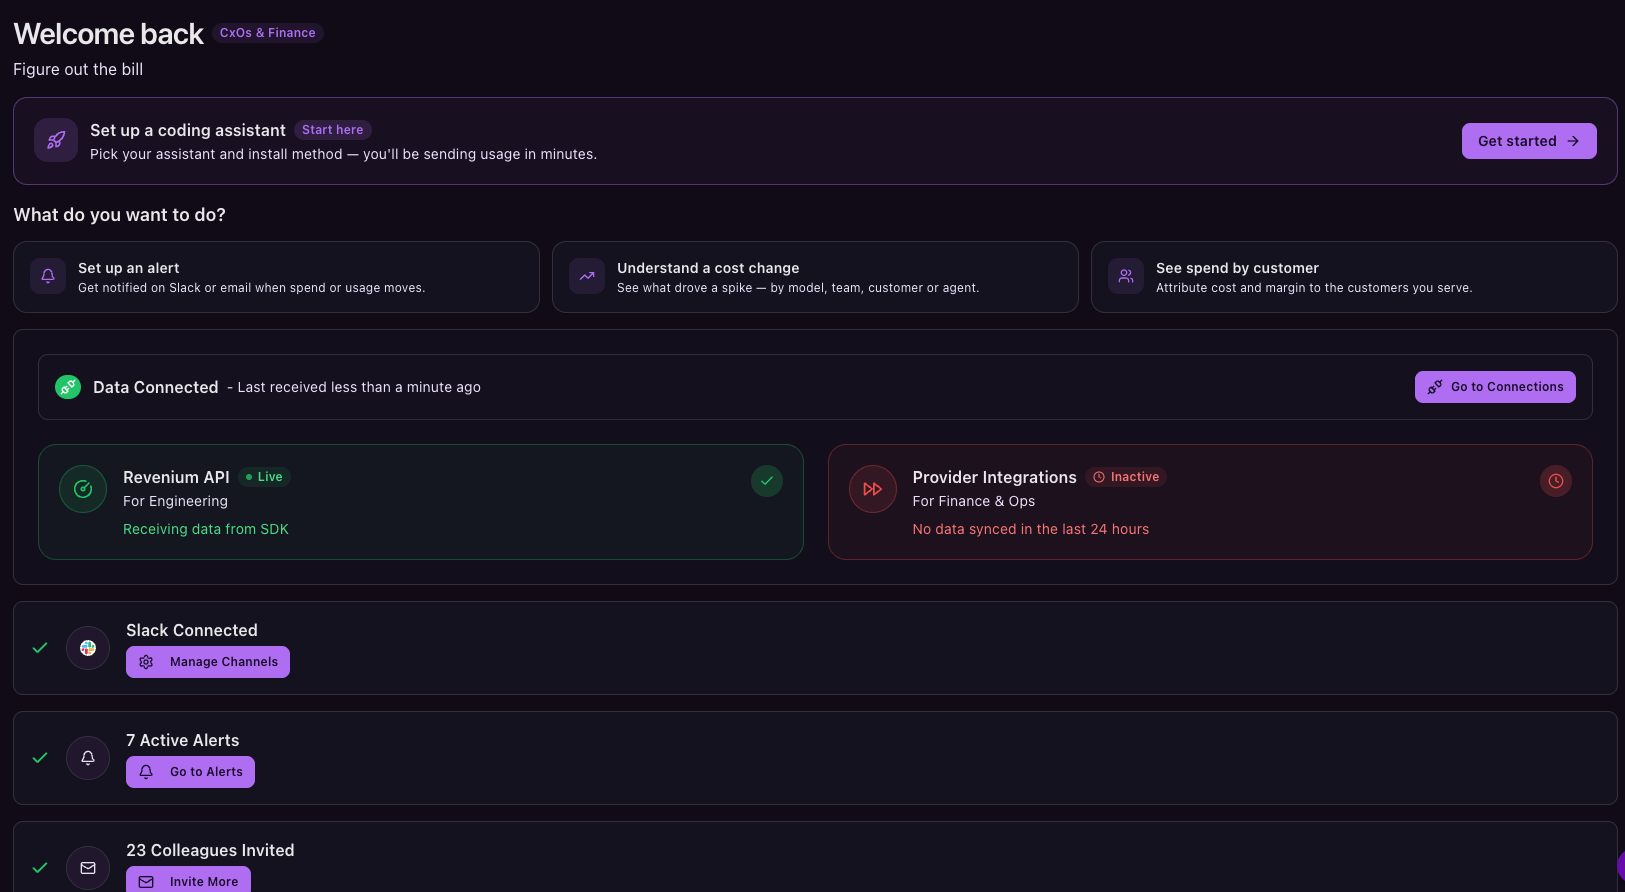
After you pick a role, the home page adapts to it:

Personalized home for the CxOs & Finance role
A role-tailored home: your tagline, a guided coding-assistant setup card, next-step prompters, and connection status.
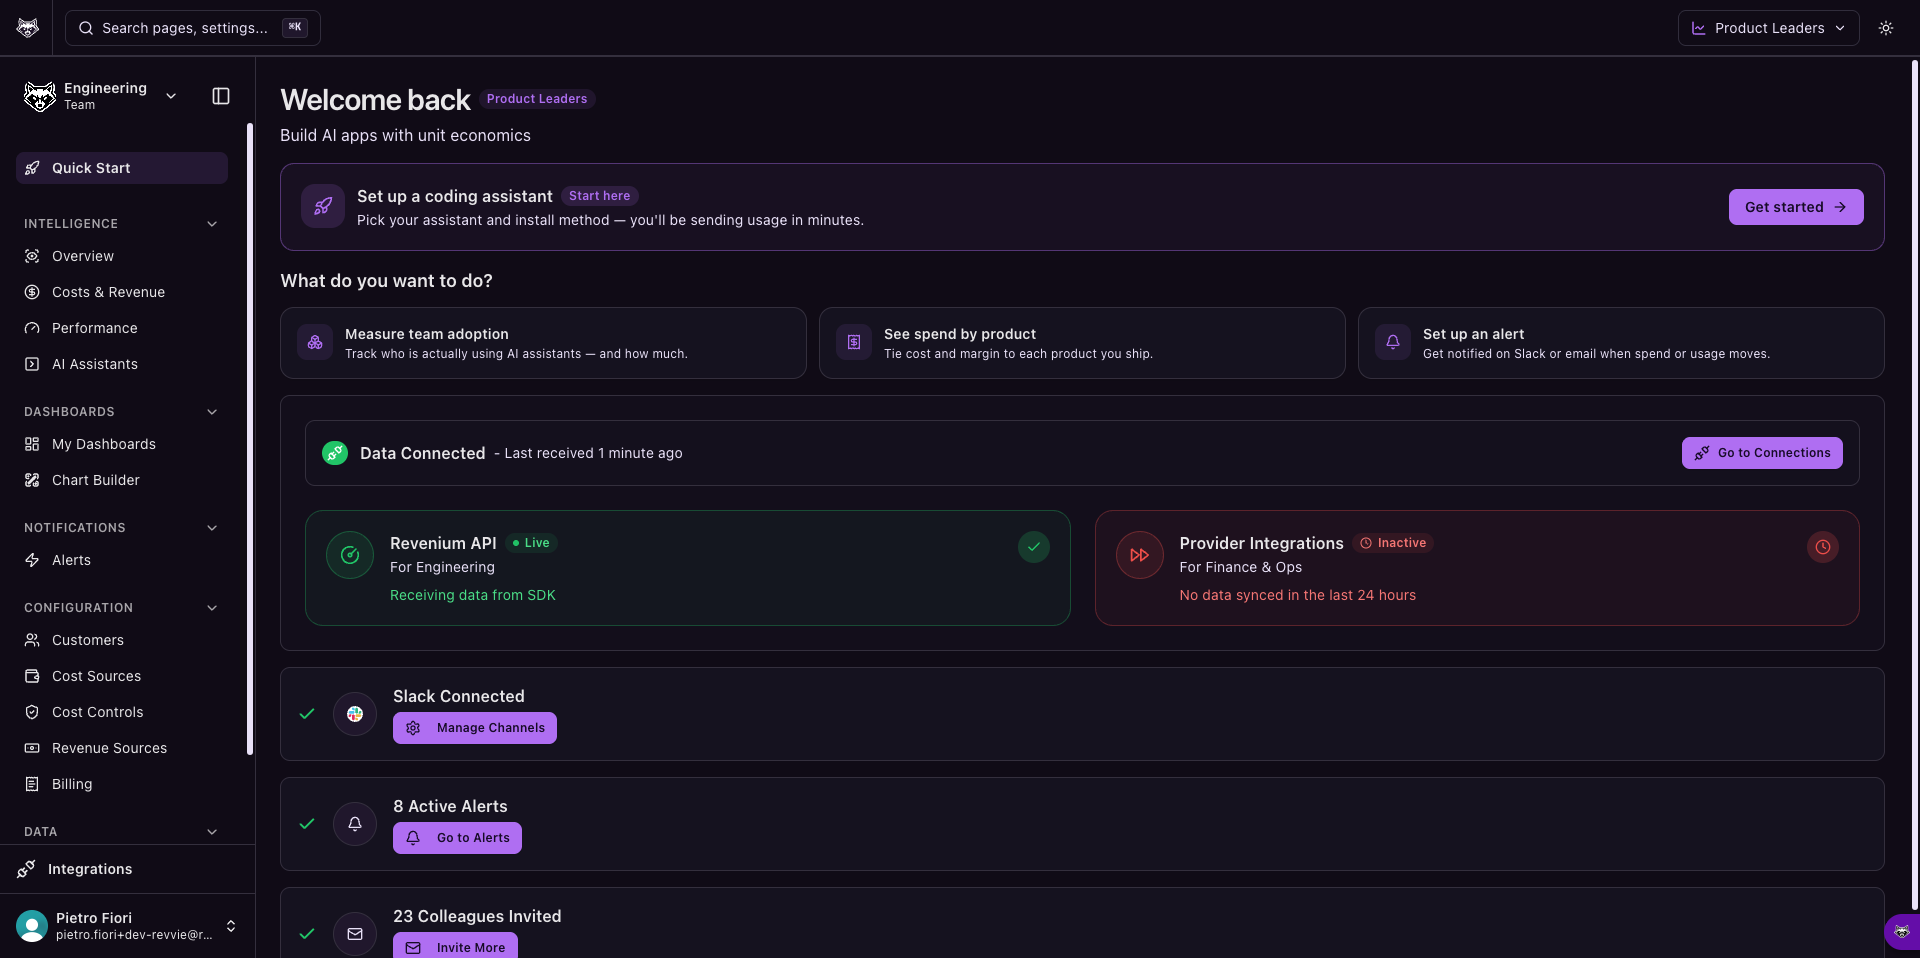
The prompters and emphasis shift with your role — Product Leaders lead with adoption and spend-by-product, while Platform & Engineering Teams lead with engineering insights and connecting data sources.

Personalized home for the Product Leaders role
Product Leaders — "Build AI apps with unit economics."
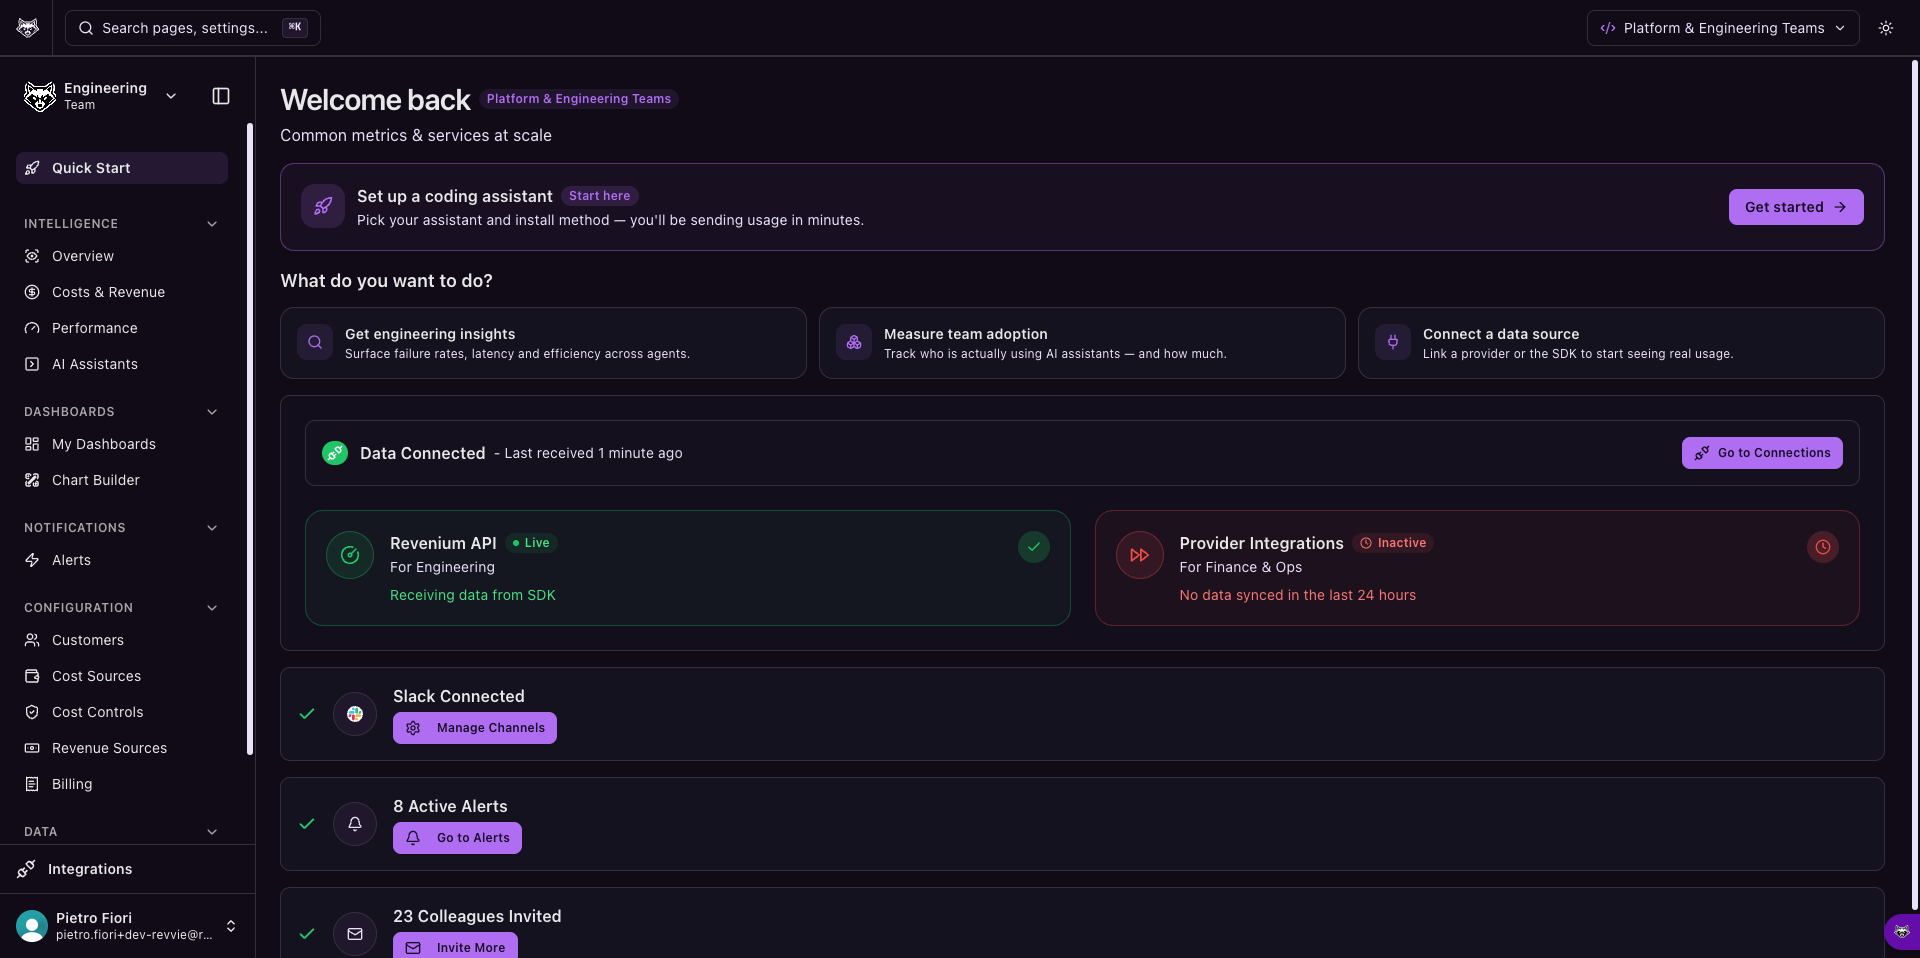
Personalized home for the Platform & Engineering Teams role
Platform & Engineering Teams — "Common metrics & services at scale."
  • Next-step prompters — under "What do you want to do?", a short row of suggested actions for your role, such as understanding a cost change, measuring team adoption, seeing spend by customer or product, connecting a data source, or setting up an alert. Each card takes you straight to the relevant screen.

  • Guided coding-assistant setup — a "Set up a coding assistant" card at the top when there's an assistant left to connect (covered below).

  • Connection & setup status — at-a-glance cards showing what's already wired up: whether Revenium is receiving data (SDK / provider integrations), Slack connection, active alerts, and colleagues invited — each with a shortcut to finish the next step.

  • Role-aware layout — the sections and insights most useful to your role are surfaced first, so the first screen you see reflects the questions you're most likely to ask.

  • Sidebar ordering — navigation is reordered to put your most-used areas near the top.


Change your role or layout

Use the role switcher in the top navigation bar at any time:

  • Change your persona… — reopens the role picker to switch roles.

  • Show all sections — temporarily reveals every navigation section, regardless of your role.

  • Customize sidebar… — reorder sections and items with drag-and-drop, show or hide sections, and set your default landing page. Your customization is saved to your browser and layered on top of your role's defaults.

Sidebar customization and the "show all sections" preference are stored per browser and cleared when you sign out. Your selected role is saved to your account and follows you across devices.


Connect your AI assistants (guided setup)

If your workspace has no AI assistant data yet, your home shows a guided setup card that walks you through connecting Claude Code, Claude Cowork, Cursor, Gemini CLI, Codex CLI, or GitHub Copilot in three steps:

  1. Pricing mode — tell Revenium whether you pay for the assistant as a fixed subscription/seat (kept as an API-equivalent estimate) or at API rates (counted as real spend). See Configure AI Assistant Pricing Mode.

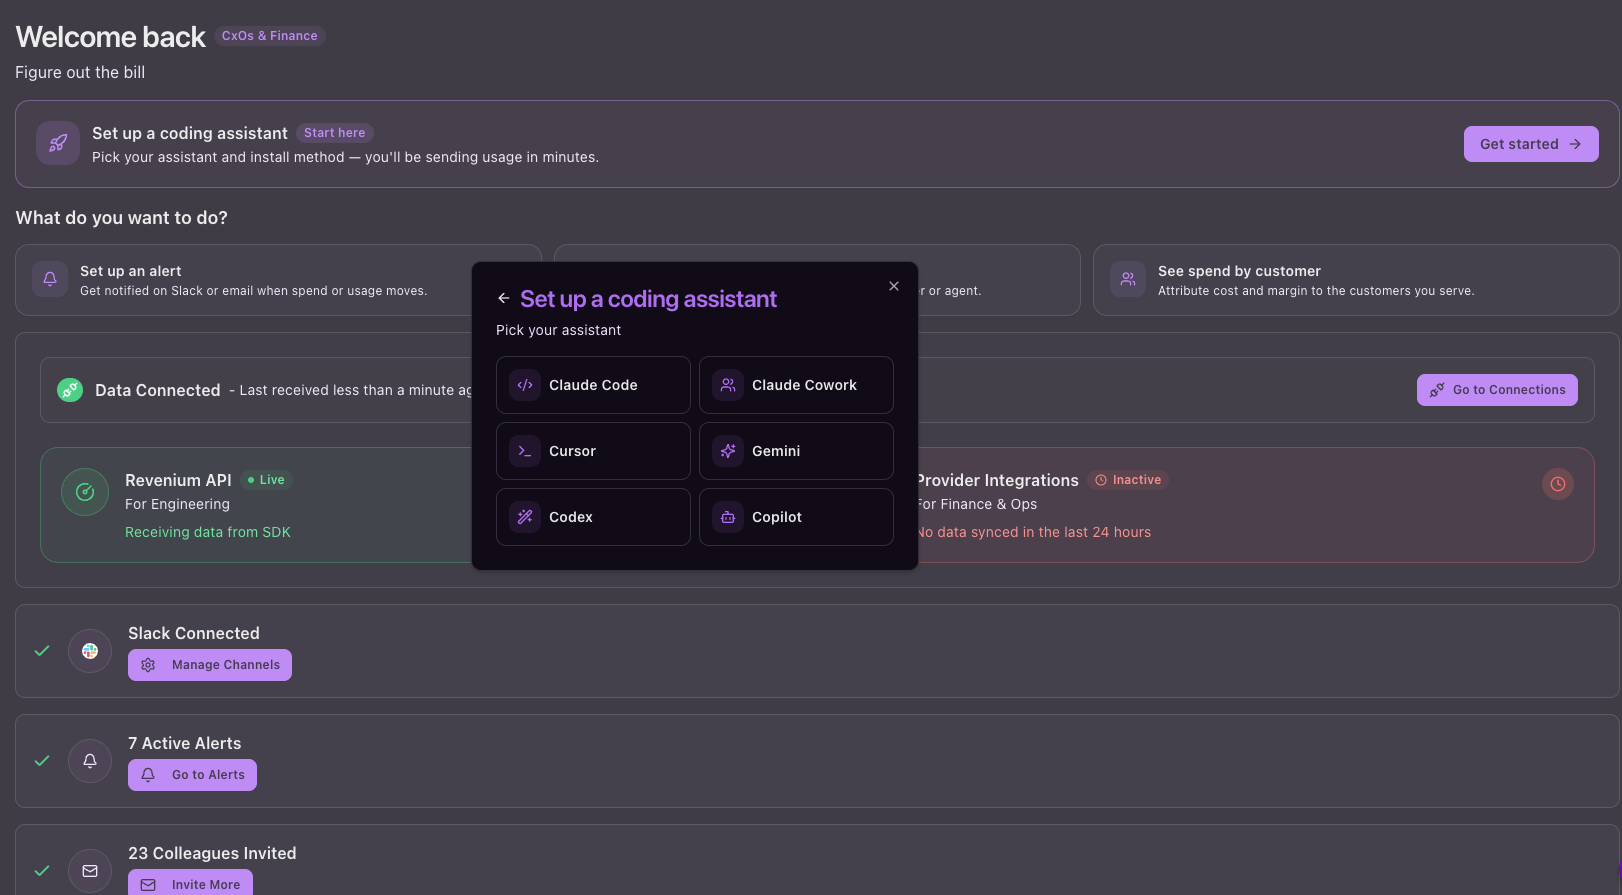
  2. Pick your assistant — choose which assistant to connect first.

Guided setup step: pick your assistant
Pick the assistant to connect: Claude Code, Claude Cowork, Cursor, Gemini, Codex, or Copilot.
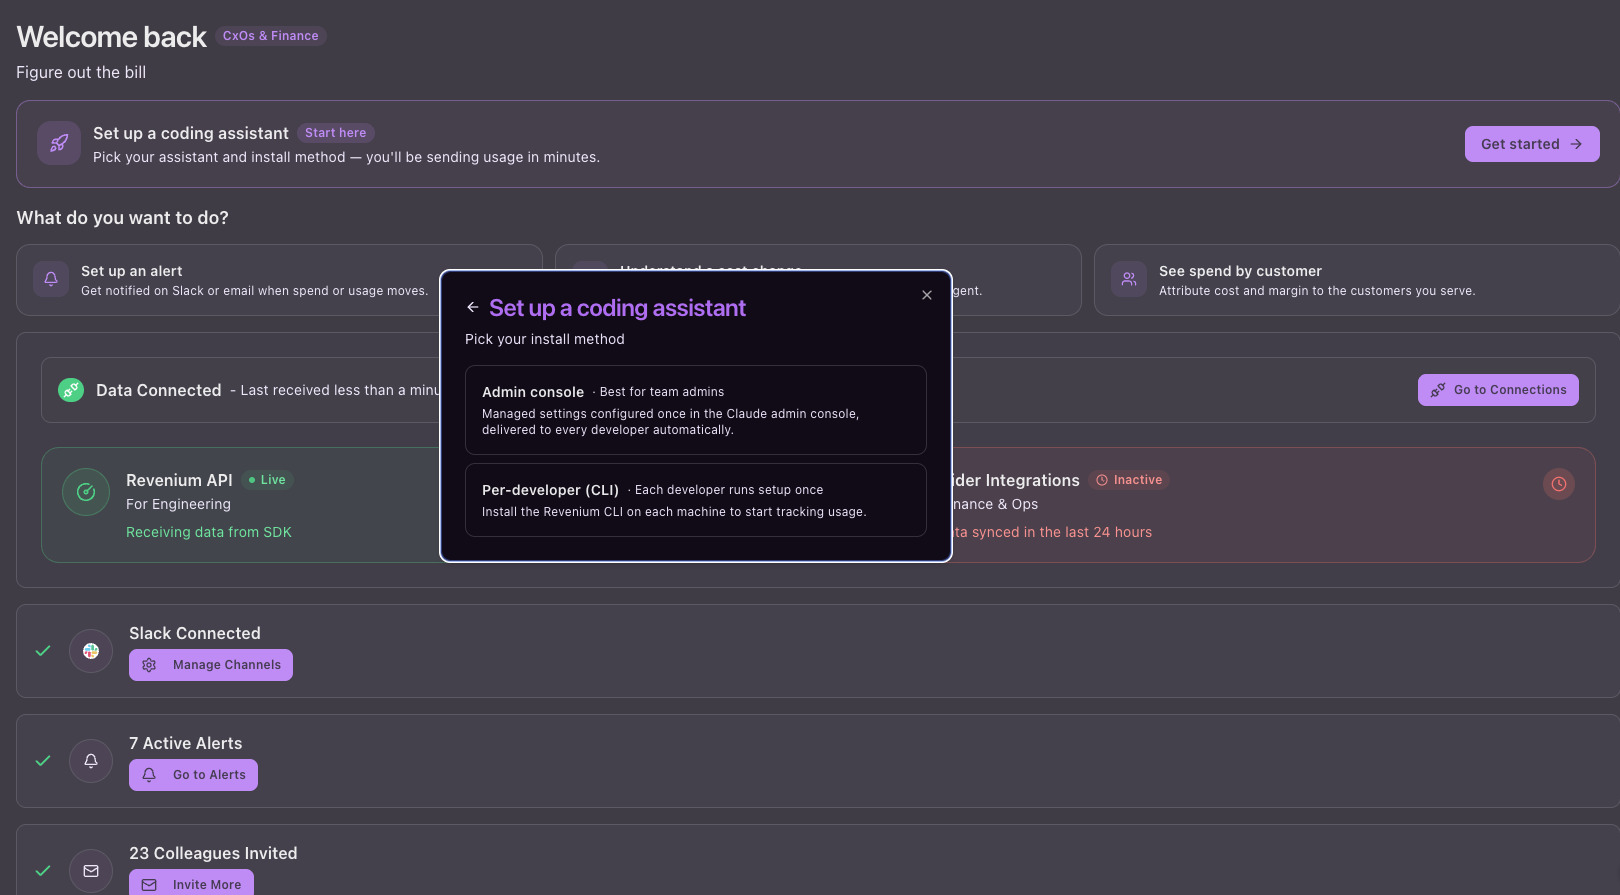
  1. Install method — when your chosen assistant supports more than one collection method, pick how usage is gathered: managed settings from the provider's admin console, a per-developer CLI install, or an admin-run API sync that pulls organization usage on a schedule. Assistants with a single supported method skip this step and go straight to the setup instructions.

Guided setup step: pick your install method
Choose how usage is collected — e.g. admin-console managed settings or a per-developer CLI install.

If your team's AI assistant pricing mode is already set, the wizard skips the first step and starts at Pick your assistant.

The card links to the detailed setup instructions for each path. For the full picture of what the assistant dashboards show once connected, see AI Assistants.


Start from one-click alert templates

Rather than building an alert from scratch, your Alerts landing screen offers one-click templates chosen for your role — for example a week-over-week spend jump, a daily or monthly spend cap you can edit, a per-model cost spike, a rising error rate, or a token-usage surge. Click a template to create the alert instantly (cross-provider, notifying you by email by default), or choose Customize to add a Slack channel or open the full alert builder.

See Set Budgets & Alerts for the full list and details.

Last updated

Was this helpful?